Illuminated nocks

I’m going to skip the whole philosophical debate about illuminated nocks and hunting for this post. For the safety of other human beings, I need to be shooting a highly visible arrow if I get a shot at a black Cape Buffalo. While fletchings of certain colors and mounting methods can make my black arrow better, they can’t match the visibility of illuminated nocks.

In the past I used Nocturnal brand nocks with my Black Eagle arrows. For the most part they worked very well. On the plus side, I NEVER had a single shot fail to light it up. That a pretty big thing in the pros column. The cons: I did have them go off in blinds and on stand by bumping the string. Even worse when hunting hogs at night is having to stare into that nock trying to find the little hole with a knife tip to turn it off. Speaking of that knife tip, I HATE that you have to have some tool to turn them off.

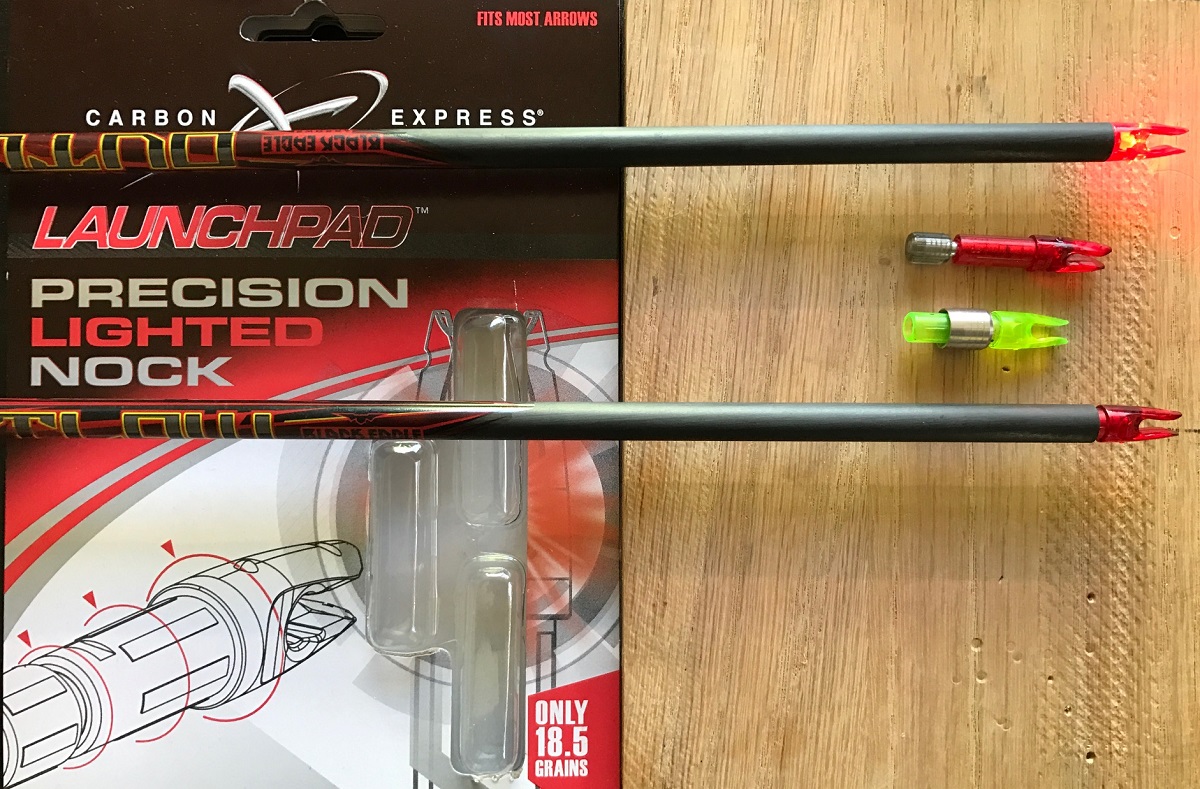
I went to the local archery shop (might as well be my second home) to buy some Nocturnals and the owner showed me his arrows setup with Carbon Express “Launchpad” nocks. The price is the exact same. The CE is supposed to be lighter at 18.5 grains, but on my scale they both read 20 grains. The final difference, no tools to turn off the CE nock, just pull and twist.  I bought one pack and shot them that night. Sure enough, they performed exactly as promised and I was very happy with the results.

I will note, this “one size fits most” is really on the tight side of my Black Eagle Outlaws in .300 spine. Every time I needed the nock tool to push them in.

Happy as I was I bought a second pack and outfitted a few more practice arrows with them. On two arrows I couldn’t get them to sit all the way in, so I left a tiny gap figuring the first time I shot them they would settle in. Maybe 1/32″ extra gap. Minuscule.  When I shot those two arrows, they lit. On the second shot, neither of them lit. On 5 more consecutive shots they failed to light.  I pulled them out and they were working perfectly. I reinstalled them by hand to the proper mounting depth and they worked perfectly on every shot since then.

I guess it pays to follow the instructions. I’m glad I resolved this before getting frustrated and going back to Nockturnals. I really don’t want to need tools afield just to deal with my nocks, especially true with TSA and international travel on the horizon. Simple is best.

Buffalo longbow

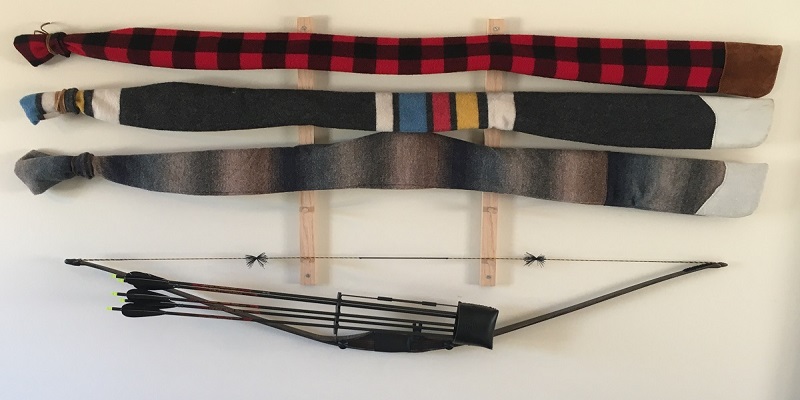
I bought a longbow to hunt Cape Buffalo in 2013. It is a Northern Mist Whisper longbow 85@30 at 68″. It’s a dandy bow and I got a hog with it in 2014. As I was getting ready for this hunt, the logistics involved with a one piece bow kept coming up. Finally, I realized that I really did need a takedown bow for this adventure.

It’s been over two years since I seriously hunted with a ASL, I’ve been hooked on my Black Widow PL longbow because I shoot it better than any other bow I’ve owned. I love ASL bows, especially the last three I am down to, but this is a dead serious endeavor and I think the best thing I can do is mimic the bow I shoot best in every possible way.

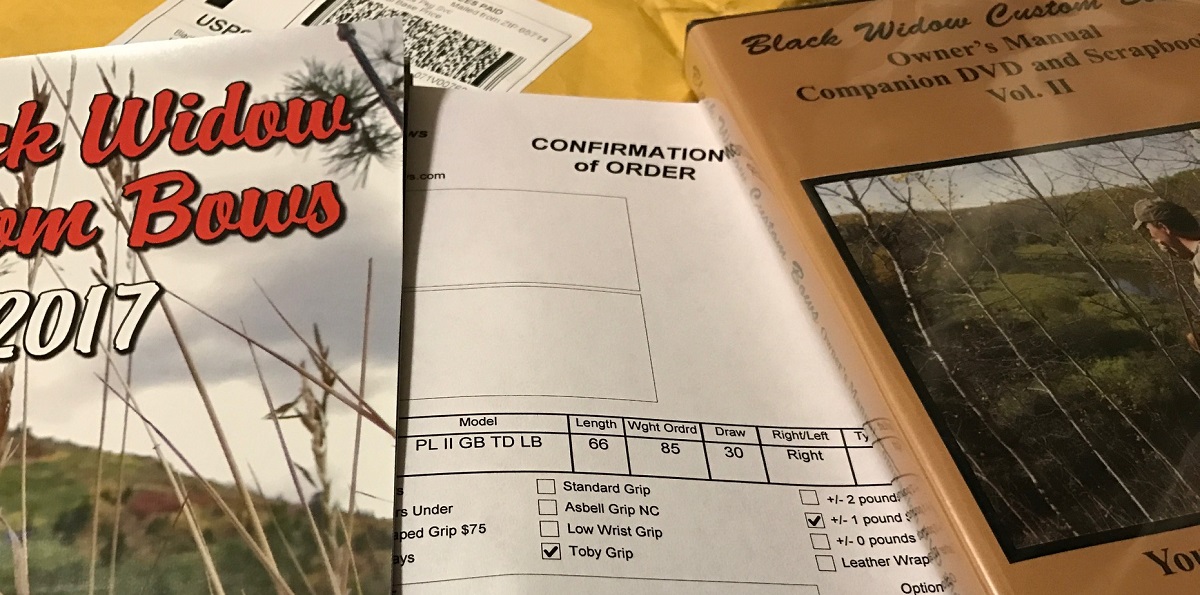
Black Widow Bows is building me a 2 piece longbow that matches my current bow in every aspect except draw weight. It will be a few weeks before it gets here, but I trust it will be exactly what I need for hunting Cape Buffalo.

Treestand System

stand setup

*** UPDATE*** I recently found out that my Muddy Pro Sticks were recalled years ago. I tried to get in touch with Muddy via their website to get replacement parts to make my sticks safe, but I never received any replies. Although I was perfectly happy with the idea of buying the parts and paying shipping to keep my beloved sticks, it seems they must be terribly busy with other things. Now I have Lone Wolf climbing sticks, but I will leave the rest of the post as it originally read.

I have used maybe a few dozen treestands at this point, and I’ve owned 5 different hang on models and 7 different pairs of sticks to use with them. While I know lots of guys who’ve used many more over many more years, one good thing is that all of my experience at this point has been in the last 6 years.

When it came time for me to invest I thought long and hard about the different styles, and I immediately eliminated ladder stands due to my mobility requirements. I like the idea of a climber and have many friends that love them, but you always end up with the “hunting the tree instead of hunting the spot” problem. While a hang on system maybe have more parts, you can get into some crazy trees and sometimes it’s those crazy trees that are where the animals are going to pass. I decided that a hang on stand would be right for me.

I had many friends encourage me to invest in a Lone Wolf, and I ignored them and bought a bunch of cheaper stands instead. In total I bought 4 stands that together cost much more than a Lone Wolf, and then I bought the Lone Wolf and gave away all the other ones. I purchased the Lone Wolf Alpha 2 at Cabelas using points. While I love this stand, had I needed to pay cash out of my wallet I would have bought a XOP Air Raid instead.

While I think my stand was amazing coming out of the package, I was inspired by Jason at the TBWPODCAST to do a little better. I wrote up how I used rubber, zip ties, and military surplus gear to drastically improve how quiet and comfortable my stand is to use. Read about it HERE if you missed it before. The final modification I made was to remove the beloved “batwing” and go with an EZ-Hang strap. Look at my zip tie and Yak Grips in the Sticktalk article, those are really slick!

With my treestand 100% awesome, now I needed sticks to get me up there. Muddy had just released their new Pro Sticks and I was intrigued. While I much prefer three long sticks to 4 short ones, these had a few HUGE advantages over the LW sticks. First the rope and cam buckle system is absolutely perfect. It is actually impossible to make metal to metal noise with one of these sticks. Second, every step is a double step so you don’t have to swap your step from side to side. As a nice bonus they are geared together so if you pull one side down it brings the other side along with it.

Assuming I’d hang my first stick at waist or chest height, I could set my second stick across the top of the first. That left me two sticks to figure out. I ended up putting two loops on each side of my harness at my waist, but out of the way of my lineman’s belt loops. I also added 550 cord loops to two of my sticks, now I can click them in to my waist with rubber covered mini carabiners. Other than the loops on two of them, I have not modified them in any structural way. I did wrap them with Howie’s Hockey Tape on a slow winter weekend last year, but functionally they are just like they came from the factory.

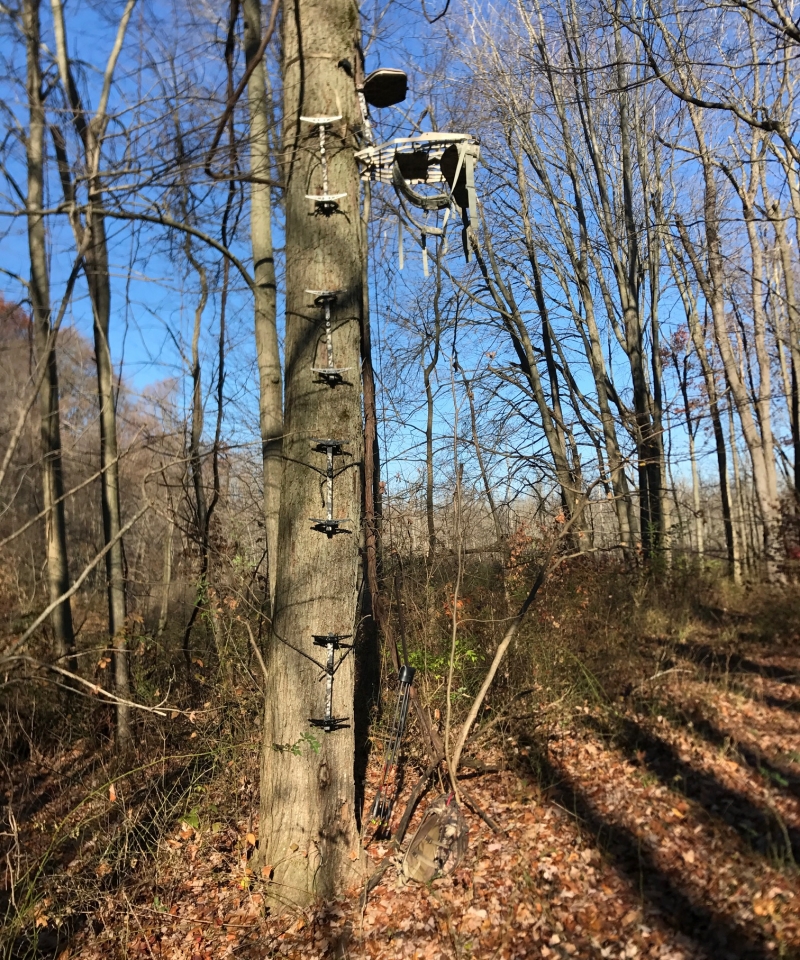
So aside from the hardware, there is one trick that makes all of this work especially good for me. I walk to my tree with my stand on my back, and my backpack hanging on it. I have my bow in my right hand, and my sticks in my left. At the bottom of the tree I always do the exact same thing:

  1. I put everything on the ground.
  2. I put on my harness, I put my EZ-Hang strap in my right cargo pocket, and my second strap in my left cargo pocket.
  3. I take my lineman’s belt and attach it to my harness.
  4. I have a rope permanently attached to the top handle of my backpack, I fish it all out and make sure its tangle free.
  5. There is a loop 6′ up from the backpack handle, I secure the top limb of my longbow to that.
  6. The every end of the 30′ rope has a loop on it, I attach it to my right side mini carabiner.
  7. I put the stand on my back like a backpack, without using the waist belt.
  8. I put the first stick on the tree, balance the second stick on the first, then put my other two sticks on my sides with the mini carabiners.
  9. I climb up on the first step and wrap my lineman’s belt around the tree and adjust the prussic knot to fit.
  10. Put on the second stick, climb up to the bottom step of it.
  11. Pull the third stick off my right side, mount it, climb onto it’s bottom step.
  12. Pull the fourth stick off my left side, mount it, climb up to it’s bottom step.
  13. Take EZ-Hang strap out of my right cargo pocket, put it chest high and cinch it up.
  14. Get a really good check on the lineman’s belt, loosen up the shoulder straps, and hang the stand on the EZ-Hang.
  15. Make all adjustments for the platform angle, etc.
  16. Install the second strap on the bottom button, cinch it up tight, double check platform level, try to twist sideways, etc.
  17. Take rope going to the backpack and longbow off the mini carabiner, put it on the top (unused) “button” on the stand.
  18. From top step, install tree tether as high up as I can reach, click the strap from my back onto it.
  19. With seat up, step down from the top step of the fourth stick onto the platform.
  20. Give it a one legged kick/push/and apply weight while keeping 3 other points of contact.
  21. Move second foot over, feel it out, remove lineman’s belt.
  22. Drag up bow, put on seat.
  23. Put backpack’s handle on the top step of the top stick. Secure excess rope.
  24. Sit down, put an arrow on the string, put the lower limb in my boot, and hunt!

OK, that looks like a lot of steps but as long as you prepare at the base of the tree for the steps you’re about to perform, it just flows from one thing to the next.

One thing I realized in typing this up, instead of putting the loop on the string between the backpack and the treestand, I want a 6′ rope on the bottom of the backpack to go to the bow. This way I can drag up the heavy backpack and hang it then bring up my bow last (without a second haul rope.) It is good to maintain a “beginners mind”!
Binoculars and Harnesses

optics

I’ve made some public posts and comments over the years and some of them I admit conflict with one another. Here is my setup as it stands in 2016.

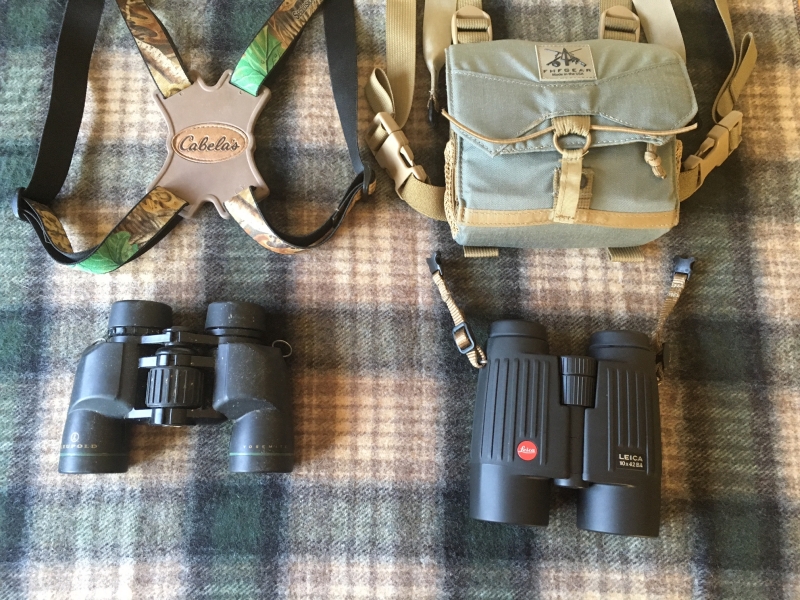
On the left you will see a 6 year old pair of Leopold Yosemite 6×30 binoculars. You can also see they are pretty well beat to hell. I bought these for under $100 with the intent on banging them up and breaking them, then replacing them with another set. These I use exclusively for hog hunting where I’m scanning very short ranges and never in early or late light. I did try to replace them with a pair of Vortex Raptor 6x32s and I didn’t like them nearly as much. If I wanted to upgrade instead of replace, I’d be very tempted to contact Maven and have them ship me a demo unit of their B3 in 6×30. At $500 that’s a pretty big investment in a pair of beater compacts.

Above my cheap glass you will see the Cabelas Hybrid harness. Even with these light binoculars I wore that neck strap for one hunt and found myself with neck pains. I bought this harness and never had the problem again. I also like how it’s never gotten in the way of my bowstring under any situation. For an added bonus I got these out of the Bargain Cave for a steal of a price!

Now on the right side of that picture, there is a whole different setup that I do not use often. My Leica Trinovid 10×42 binoculars are the older generation but the glass is phenomenal! 10x is right at the top of what I can hand hold when buck fever is kicking in, and they are small and light enough to not be a hindrance like models with 50mm objective lenses. I was using these to size up pronghorn bucks at long distances on the prairie this season and found these very well suited for the job.

To protect the nice Leica glass, I invested in a great harness. I first looked at the Kuiu and it had some nice features but a few things I didn’t like. Next I checked out the Sitka Gear Bino Bivy which looked great, but I didn’t want the zipper. That was when I found FHF Gear and I bought that one. I really like that the harness is fully connected all the time and the binoculars have separate webbing going to them and that everything is very adjustable. I also like the simple closeure system and that there are some pockets on the flap, sides, and under the flap for different small items like calls, a lens cloth, etc.  I actually spent more on this harness than I did on both my cheap binoculars and my cheap harness, but I’m very happy to have made the investment to protect my quality glass.

I hope this clarifies any old comments on old forums or websites that might still be floating around.

Lights

lights

I’ve gone through probably a dozen headlamps and nearly a dozen flashlights over the past decade and I really like my current system. I have 5 total lights in my system, but I’ll spend most of my time on two of them.

The light I use at least 90% of the time is my Cabelas Alaskan Guide XR made by Princeton Tec. What I love about it: with one click it will turn on to the lowest setting in a red LED. If you click it multiple times it will go into white light and get brighter. Since I hunt hogs I like going into a low lumen red light with one click. Also I don’t always want to advertise my stand location to other hunters by turning on white light just after dark. This takes 3 AAA batteries. I keep this headlamp and 3 spare batteries in my hunting pack all the time. For evening sits sometimes I put it in my cargo pocket before I put on my harness so I don’t have to fumble around for it during magic hour.

The second light is my super bright handheld, an Eagletac DL25LC2 Clicky. What I love about it: I can twist a quarter turn then hit the power button and get “moon” mode with a very low output white light that can last for days, or I can twist back into turbo mode and get full power for an hour or so. Since blood tracking at night requires a bright light, I carry two spare rechargeable 18650s in my pack with this light. I figure if I can’t find something in 3 hours I should probably be waiting til morning anyway. That link goes to a bundle with an amazing price, I wish it was available when I bought two of these a few months ago!

My other headlamp is another Cabelas, this one is the Alaskan Guide QUL also by Princeton Tec. Where the first two lights live in my backpack, this one lives in the center console of my truck. It starts to the brightest level of white light. I like this for my truck because it gets me handsfree light to do whatever I need whenever I need it. At the price, you can’t lose.

Flashlight number two is a cheap hardware store model. It has an low lumen LED and two AA batteries. The idea behind this light is I leave it next to my cot or on the camp table so I can always have one light handy without taking one of my main lights out of my hunting pack (and thus not forget to put it back in!)

Last light is a really cool one, it’s a LUCI solar lantern. If you don’t have one already, just go ahead and buy three! Seriously I have two in my camp kit and I normally put one in my tent and one under my kitchen canopy. Third one stays in my house to be used during power outages. No batteries to drain or replace, and it throws pretty good light.

There is my entire lighting system. I focused on the first two as they are what I use in the field, but I hope the other information is useful to some.

Two Knife System

After years of carrying a combination of fixed blades and sharpeners, I’m changing up my approach a little this season.

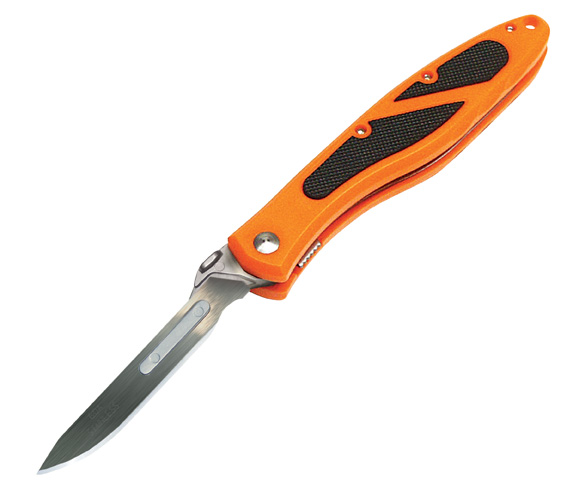
Last year a successful hunter and I hung his hog in the skinning shed and we broke out our knives to skin, quarter, and pack his meat for the road. I was using a much beloved custom knife for my parts, he used this little scalpel handle with replaceable blades.

piranta

I’d seen these before, but I’d never used one. He put a fresh blade on that thing and I was very impressed by seeing how sharp it was and how well it held that edge over the course of the entirety of the process. I appreciated how the tiny blade helped in freeing up things in tight spaces.

The following Monday I bought one of my own, and just two weeks later I got to use it to dress and butcher a few hogs. One benefit I really liked was putting on one blade to do the dressing and skinning, then putting a fresh blade on for butchering. I purchased a 100 pack of blades on Amazon so my cost per blade is only about thirty cents.

I see only 3 “cons” to this system. First, those blades are so crazy sharp a guy could cut himself up pretty good and not know it. Second, those blades are so sharp that even a tiny slip will cut easily through a hide during skinning. Finally, the folding system can get bits of meat and debris in it that you need to clean out. For that last piece I also ordered a Havalon #8 Handle which is a solid handle for the same blades. This is what I do my basic caping and skull work with.

The other half of my two knife system is my multi-tool.

rebar

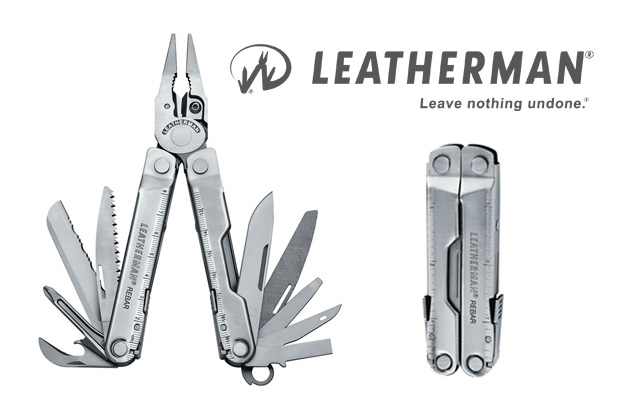
I recently sold my Juice, my Wingman, and my Skeletool and purchased a Rebar. It is bigger and heavier than any of my previous tools, but it eliminates a few other items so I believe it to be worth the weight.

So if my Havalon only comes out for game processing, this is going to be 100% of the rest of the time. Here is how I came to chose the Rebar and found myself paying for yet another Leatherman:

Pliars – required to change blades safely on Havalon. One million other uses too.

Saw – pelvic and breast bones in a pinch.

File – retouch a broadhead if needed out of camp.

Blade – “rope and cheese” as Steve Rinella would say.

Serrated blade – I actually had a main blade snap off one of my old multi-tools, it had a serrated blade I used as a backup until I could get a replacement. Glad to have a second blade on this one.

Everything else – nice mix of wire cutters, screwdrivers, awl, etc.

This is the best Leatherman I’ve owned (going back to the early 90s) and I’ve very happy with it after it’s first two hunting trips.

So there you have my Two Knife System as it lives in my backpack. I have some other fixed blades in heavy butchering kit that I really like, but I will save that for another post.

Black Eagle Arrows

VintageAndMagnus

When I restarted my archery journey as a man, I went immediately to the aluminum arrows I was accustomed to as a boy. I think that xx75s, xx78s and Legacy shafts are a great way to learn a lot about arrow building and tuning, and I’m glad for all of the arrows I built, shot, lost, and broke. The experience and knowledge gained was invaluable!

After a few years of that, as I was ready to really set my sights on hunting. I went back and forth on carbon as an arrow material for quite a while, but eventually I did build a few dozen. Augmenting what I knew with what I learned, I found the material to be superior to aluminum for my hunting needs. The only problem I had with carbon was that the shafts were so expensive! The shafts I was using where $15 per shaft at the local pro shop.

When Simply Traditional started carrying Black Eagle I had the opportunity to shoot some of the first two sets that came in.  I spent some time shooting the Carnivores as well as the Zombie Slayers. They both made fine arrows, but I wasn’t drawn to change my setup for either of those shaft materials based on performance or savings.

A short time later the Outlaws were announced. They were much cheaper for bare shaft purchases, and they held an even lighter Grain-Per-Inch than the previous models at .300 spine. Since I am a believer in high FOC I want my shafts well below 10 GPI and these came in at 9.1 GPI. I bought several dozen Outlaw shafts for different bows in different spines and found that I loved them in every application. At this point I converted entirely to Black Eagle Outlaws. At $70 per dozen I was getting 3x as many shafts as the one’s I’d been buying at the local pro shop.

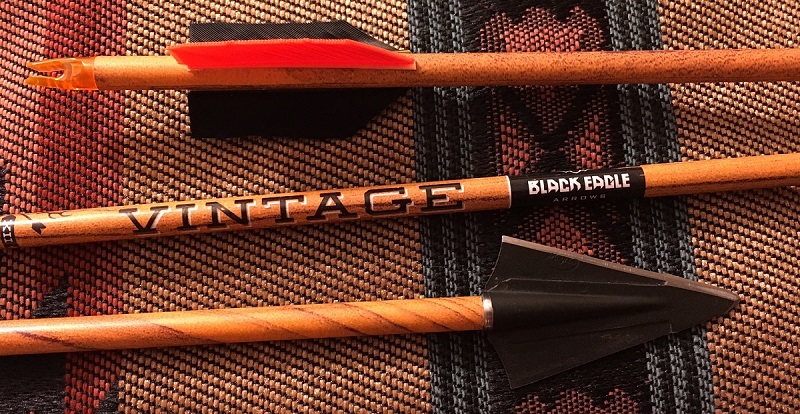
When the much anticipated Vintage shafts came out I purchased a dozen of them as well. These are very much like the other Black Eagle shafts, ut they have a very nice wood grain look to them which is why I picked them for the picture above. They are advertised down to .350 spine, which is what I ordered. They came at 34″ total length which I thought was awesome, but I had to keep cutting them shorter and shorter to compensate for the weaker spine compared to my .300 Outlaws. In the end I needed to remove 150 grains of tip weight to get the Vintage flying right on my test bow and that created an arrow too light for my preferred hunting setup. IF I had a draw over 31 inches, you can bet this would be my go-to shaft!

I will say that all the other Black Eagle shafts hold tighter tolerances than the Outlaws. Outlaws are to a tolerance of .006 and all the other Black Eagles are about twice as good, or even better. Those are tolerances that I could never observe an effect from shooting a glove, finger release, from a stickbow. I’ve very grateful that Black Eagle provides what I believe to be the perfect shaft option for me to build extremely high FOC arrows, at reasonable tolerances, for an incredible price. I intend to shoot .300 spine Outlaws for the foreseeable future.

Black Widow Longbow

After buying and selling many bows, I have one that I’ve pretty much settled on. Black Widow PLII takedown longbow 66″ 64@30.5″.

4bowsAug16

Here is a little about how I came to this bow.

Black Widow: I sure hope this doesn’t sound nasty, but I never really liked their bows. They seemed expensive, a little plain, and some of the people who tout them can be a little overbearing. For these reasons I fought against trying them for almost 3 years. At one point I sold all my longbows expecting my new custom to be delivered, but it was delayed for a week. My shooting partner handed me his 66″ PLV 57@29 to use while I waited for my new custom to be delivered. By the end of the first week I couldn’t give it back. It was the one Widow he wanted to sell because it was so long, and it was the only one I wanted to buy for the same reason. I am a very reluctant Black Widow fan.

PL 2: I shot the snot out of that old PLV and I killed some game with it. I really grew to like many things about the bow and it had pretty much turned into my “one bow”, that is until I had a chance to possibly fall into a last minute 10 day safari. I decided on the spot I would order a second PL as a two piece to be my go-to hunting bow, and move my PLV to my backup bow. The guys at Black Widow said they could meet my timeline with two weeks to spare so I sent in my deposit.

Since I wanted these bows as close to identical as possible, I gave the guys at Black Widow the serial number of my PLV and they pulled it up. They confirmed 66″, 57@29. Put on a digital scale, and drawn to my true draw length of 30.5″, these two bows build 6 years apart are only 4 ounces different. This was WAY closer than I expected!

With all of the functional parts being the same, I asked for a few things different.

  1. I wanted the PL2 to save money on the bow, since I planned to spray paint it I didn’t care about finishes.
  2. I took the money saved and ordered it +/-1 pound of the other bow. It came out on the money.
  3. I wanted a solid phenolic riser for durability, and I wanted them to put quiver inserts into it. I know, I know. “Longbows aren’t supposed to have those.” I’ve used every quiver mounting method, and I’ve owned all of the takedown systems. The 2 piece sleeve and bolt on quiver are MY combo. If you have something different that works for you, believe me, I am happy for you.

I’ve owned many faster bows, prettier bows, etc. I planned this bow out to remove as many points of failure as possible. I planned every piece to be resistant to as many environmental factors as possible. It has a rubber grip instead of the fancy beaver tail. I shoot D97 for cold weather, and BCY-X for hot weather. All silencers are rubber catwhisckers, rubber tip protectors on both ends, quiver has hand screw knobs instead of an allen attachment, etc.

Someday I’ll add a post about my journey with my old PLV. It’s a sweet story and it’s been a great bow. It hangs right next to my desk and it’s comforting to know it’s right there if I ever need it!

Oh and about the safari, it didn’t shake out. At least now I’m ready the next time the opportunity arises!